An underexposed photo is darker than you intended, but that does not automatically mean the camera failed or the image is unusable. In most cases, the camera simply made a reasonable exposure decision based on a difficult scene. A bright window, a pale shirt, or a backlit subject can all persuade the meter to darken the frame. The useful question is not just how to brighten an underexposed photo, but why it became dark in the first place.
I have spent years testing sensors and lenses on a bench, then watching the same equipment behave on real assignments. The best camera is the one you understand. Once you know what the meter is seeing, fixing exposure becomes a small adjustment rather than a reason to shop for a new body.
What underexposure actually means
Exposure describes the amount of light recorded by the sensor. An underexposed photo contains less recorded light than your creative intent requires. Shadows can become nearly black, colors can look muddy, and skin tones can lose detail. The camera may still have captured enough information to recover, especially if you photographed in RAW, but lifting dark areas can also reveal noise and color shifts.
The exposure triangle gives you three controls. Aperture changes the lens opening and affects depth of field. Shutter speed controls how long light reaches the sensor and can introduce motion blur. ISO increases the signal from the sensor; it does not create more light, though a higher setting makes a brighter preview and can make a correct exposure possible in dim conditions.
A practical example makes this clearer. At a beach during sunset, your camera sees a bright sky and protects those highlights by making the foreground too dark. In a room with a sunlit window, evaluative metering can do something similar. The result is an underexposed photo even though the camera's meter is behaving as designed.

Start with the histogram, not your screen
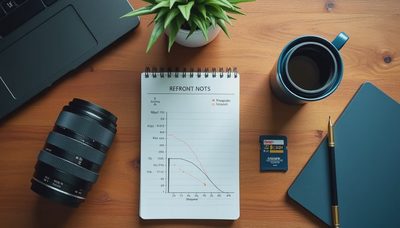
Your camera screen is a poor judge of brightness in direct sunlight. The histogram is more reliable. It is a graph showing how many pixels fall across the tonal range, from black on the left to white on the right. If the graph is piled heavily against the left edge, you probably have an underexposed photo. If it touches the right edge, highlights may be clipped.
Look for the important subject detail rather than trying to center every histogram. A night street scene should have plenty of dark pixels. A snowy landscape should lean toward the right. The goal is to preserve detail where it matters. Use highlight warnings, sometimes called blinkies, alongside the histogram to see whether bright areas are losing information.
If you are photographing a person against a bright background, zoom in on the face during playback. A slightly bright sky is often easier to accept than a face with no shadow detail. This simple check tells you whether the problem is global exposure or a subject that needs different metering.
Fixing exposure in the moment
In aperture priority, use exposure compensation to tell the camera to make the frame brighter or darker. A starting adjustment of plus one stop is often enough for a face in backlight, though the correct amount depends on the scene. A stop represents a doubling or halving of light, so plus one stop is a meaningful change, not a tiny trim. Watch the histogram after each adjustment.
In manual mode, open the aperture, slow the shutter speed, or raise ISO. Choose based on what you need to protect. For a static landscape on a tripod, a slower shutter speed is usually harmless. For a moving child or a wedding processional, preserve a shutter speed around 1/250 second or faster and accept a higher ISO if necessary. For a portrait where background blur matters, open the aperture before changing other controls.
If the same lighting problem repeats, change the metering approach. Spot metering reads a small area, center-weighted metering prioritizes the central region, and evaluative or matrix metering considers much of the frame. None is universally best. Spot meter from a face when the subject is the priority, then recompose carefully or lock exposure before you move the camera.
Recovering an underexposed photo in editing
RAW files give you more flexibility than JPEG files because they preserve more sensor data before the camera applies processing and compression. In Lightroom, Adobe Camera Raw, Capture One, or similar software, begin with the Exposure slider. Increase it gradually, then use Shadows to open darker regions. Keep an eye on skin, clouds, and other areas that should retain texture.
Avoid immediately pushing every slider to the maximum. Raising exposure by two or three stops can make an underexposed photo look bright, but it can also expose banding, chroma noise, and unpleasant color in the shadows. Reduce noise after you establish the brightness you actually need. A modest increase in Luminance noise reduction can help, while excessive reduction turns fine detail into waxy shapes.
Use the Blacks and Whites controls with restraint. Blacks establish the deepest tone, while Whites affect the brightest part of the image. If you lift shadows too far, restore some contrast with a gentle curve rather than crushing the blacks again. Local adjustments are often better: brighten a face with a mask while leaving a dark background alone.
When recovery is not the right answer
Not every underexposed photo deserves a rescue attempt. If the subject is blurred, focus missed, or the sensor recorded almost no detail in a critical area, editing cannot recreate genuine information. A dark jacket with subtle texture might recover beautifully; a completely black patch under a subject's eyes probably will not.
Compare the original file at 100 percent magnification. Look for texture in hair, fabric, and walls. If those details appear as smooth blocks after lifting the exposure, choose a different frame if one exists. This is not a failure. On a commercial shoot, I routinely make the selection based on expression, focus, and usable detail before spending time on color.
A slightly dark image can also be intentional. Low-key portraits, concert photographs, and moody interiors often place much of the frame near black. Correct exposure serves the picture, not a rule that every histogram must look balanced.
A repeatable field checklist
Before pressing the shutter, identify the part of the image that cannot be replaced: a face, a white dress, a sunset, or a highlight on a product. Check the meter, then take a frame and review the histogram. If it is dark, ask whether motion, depth of field, or noise matters most.
For a still subject, try a slower shutter speed or a tripod. For movement, protect shutter speed and raise ISO. For backlighting, add positive exposure compensation or use fill flash. A small on-camera flash pointed toward a nearby wall can soften the light, while direct flash can provide useful fill outdoors when the subject's face falls into shadow.
Then take another frame. This second exposure is not wasted; it is a test that teaches you how your camera interprets the scene. With practice, you will recognize the conditions that create an underexposed photo before they become a problem.
The gear lesson
A newer camera can offer cleaner high-ISO files and more recovery latitude, but it will not understand your subject better than you do. Learn where your current camera displays the histogram, how exposure compensation works, and how quickly your lens becomes too slow for the scene. Those skills transfer from a Canon EOS R50 to a Sony a6700, Fujifilm X-S20, Nikon Z6 III, or any other system.
The next time you see an underexposed photo, begin with diagnosis rather than panic. Check the histogram, decide which exposure control protects your image, and recover only the detail that matters. The best camera is the one you understand, and understanding exposure will improve more photographs than a new camera bag ever will.