Learning how to clean photo lens surfaces is less about buying an expensive kit and more about using the right order of operations. Dust, fingerprints, salt spray, and fine grit are normal parts of photography, especially if you change lenses outdoors. The danger comes from dragging that grit across the glass or using a household cleaner that leaves residue.
I have cleaned lenses before commercial shoots, weddings, and windy beach sessions, and the same principle always applies: remove loose particles before touching the optical surface. A modern lens has coatings that improve contrast and reduce reflections, but those coatings are not a license to scrub. Slow, light, and deliberate is the professional approach.
What you need before cleaning
A basic cleaning setup does not need to cost much. Keep a rocket-style air blower, a clean lens brush, several fresh microfiber cloths, and lens-cleaning fluid in your camera bag. A blower with a rubber bulb is preferable to canned air, which can spray propellant or create a forceful burst that moves grit around unpredictably.
Use cloths made for optics rather than a T-shirt, paper towel, facial tissue, or ordinary household rag. Even a soft-looking fabric can hold tiny particles that create fine marks. I keep one microfiber cloth in a sealed plastic pouch for the front element and another for the camera body. Once a cloth touches sunscreen, skin oil, or a dusty table, it no longer belongs on glass.
A cleaning pen can also be useful. It typically has a soft brush on one end and a carbon-based cleaning tip on the other. I consider it a convenience tool, not a replacement for a blower. If the lens is visibly gritty, brushing or rubbing first is the wrong move.

How to clean photo lens step by step
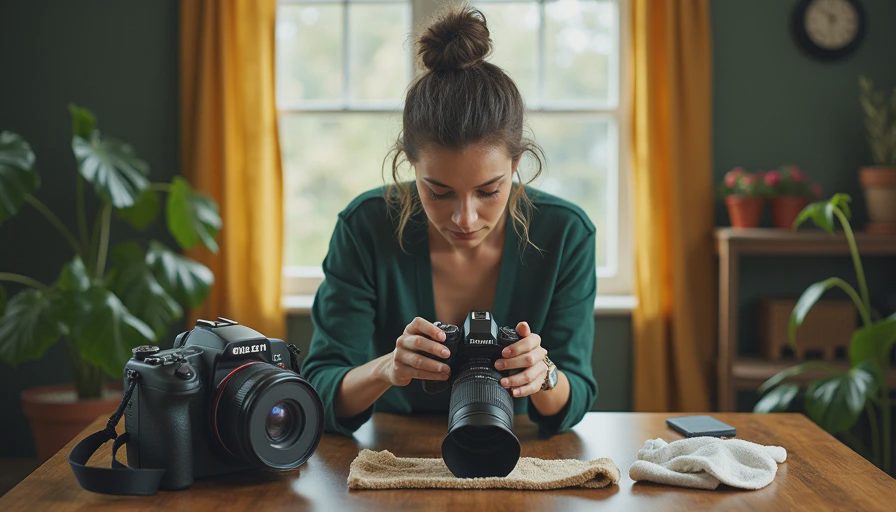
Start by moving to a clean, well-lit place. Turn off the camera, remove the lens if necessary, and place the front cap on the rear mount. If you are cleaning a mounted lens, keep the camera pointed downward so falling dust is less likely to settle inside the mount.
First, use the blower several times while holding the lens with the glass facing slightly downward. Do not touch the blower tip to the element. Look at the glass from an angle; normal front elements can appear clean straight on while showing a fingerprint or a line of dried spray under side lighting.
Next, use a lens brush only if particles remain. Let the bristles do the work with almost no pressure, sweeping from the center toward the edge. Do not use the brush on a wet fingerprint, because oil can spread through the bristles and make the problem larger.
Place one or two drops of lens fluid on the cloth, never directly on the glass. The cloth should be lightly damp, not wet. Wipe in small circles or gentle strokes from the center outward, then use a dry section to remove any remaining film. If the lens still looks smeared, switch to a fresh cloth instead of pressing harder.
How to clean photo lens filters and rear elements
A clear or UV filter can protect the front element from fingerprints and airborne spray, but it still needs the same careful treatment. Remove the filter from the lens before cleaning it when possible. Hold it by the rim, blow away dust, and clean both sides with a lightly damp microfiber cloth. If the filter has sand caught around its threads, do not force it off; brushing the rim first can prevent metal particles from reaching the glass.
The rear element deserves extra caution because it sits close to the camera sensor when mounted. Blow away dust and use minimal contact. Do not poke at the contacts, and avoid flooding the area with fluid. If contamination is inside the lens or on a sensor rather than on the exposed rear element, stop and use a qualified camera service center.
Understanding how to clean photo lens accessories also helps prevent repeated work. Clean a filter before putting it into a case, cap both ends of a lens after use, and keep caps in a pocket that is not full of loose sand. A $20 filter case and a couple of spare caps can save more frustration than a premium cleaning kit.
Mistakes that cause damage
The most common mistake is cleaning too often. A few specks of dust on the front element rarely show in an image, particularly at normal apertures. Repeated rubbing creates more risk than a small particle. Clean when there is a visible fingerprint, oily mark, dried moisture, or debris that affects handling or image quality.
Another mistake is breathing heavily on the lens and wiping immediately. Breath contains moisture and can leave minerals or residue behind. A brief breath may work in an emergency, but proper fluid is more consistent. Never use glass cleaner, rubbing alcohol, vinegar, household disinfectant, or premoistened eyeglass wipes unless the manufacturer specifically says the product is safe for camera optics.
Avoid circular polishing with force. Pressure does not make a lens cleaner; it increases contact between the cloth and any remaining grit. Also avoid cotton swabs, shirt hems, paper napkins, and compressed air. These shortcuts are common because they are convenient, not because they are appropriate for coated optical surfaces.
A practical cleaning routine for photographers
Before leaving for a shoot, inspect the front element under a small light. If it is clear, cap it and stop there. During the day, use the blower after working near a dusty trail, a beach, or a construction area. At the end of a job, check for fingerprints caused by changing lenses quickly or adjusting a hood.
For a typical kit with a Sony 24-70mm zoom, a Fujifilm prime, or a Canon telephoto, I would rather see a photographer carry three clean cloths than one cloth used for everything. Store the blower in a bag pocket where it cannot collect crumbs. Replace cloths when washing no longer removes their oily feel, and wash them separately without fabric softener.
If you are traveling, put the camera in a sealed bag before moving from cold air into a warm room. This reduces condensation on the equipment. Let the bag warm gradually, then inspect the lens. Moisture on the outside can be wiped carefully, but fogging inside an element requires patience and sometimes professional attention.
When cleaning is not the answer
Cleaning cannot repair a scratch, fungus, separation between lens elements, or damage under the front element. A mark on a filter may be solved by replacing the filter, while damage to the lens itself deserves an estimate from the manufacturer or a reputable repair shop. Do not disassemble the lens at home; even a straightforward zoom contains precisely aligned optical groups and seals.
If photographs suddenly look hazy, compare a shot with the lens hood removed and inspect the front and rear elements. A smear, condensation, or a dirty filter can reduce contrast, but autofocus problems and soft corners can have other causes. Test with another lens before assuming the sensor or optics are permanently damaged.
The best camera is the one you understand, and that includes knowing when not to touch it. Once you know how to clean photo lens surfaces safely, maintenance becomes a short, calm routine rather than a nervous polishing session. Remove loose dust, use proper fluid sparingly, and let clean tools do the work. Your lenses will stay ready for the next photograph without being treated like fragile museum pieces.